Material TabBar Example output
 |
| Tab1 : Android |
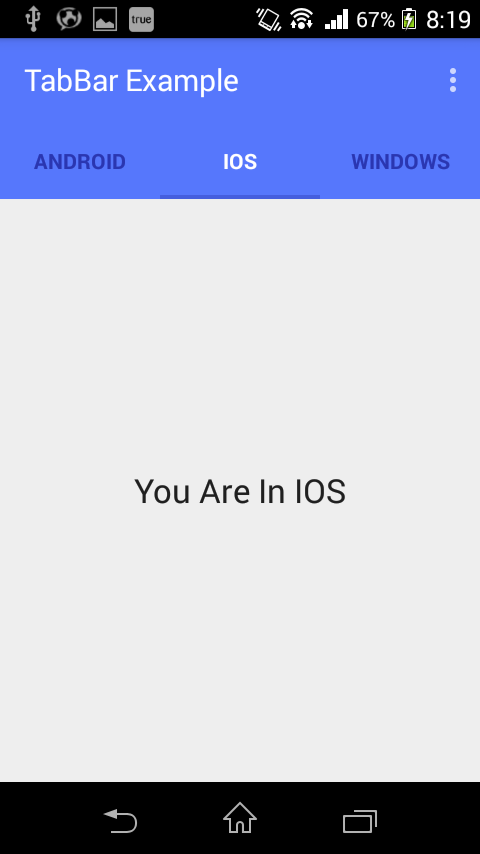 |
| Tab2 : IOS |
 |
| Tab3 : Windows |
Project
Structure :
 |
| Project Structure |
Step 1:
Check or Edit In Dependencies : Gradle
Scripes->build.gradle(Module app)
styles.xml
Add this 3 lines between <style> and </style> Tag
[code] <!-- Customize your theme here. --> <item name="windowActionBar">false</item> <item name="windowNoTitle">true</item> [/code] Create color.xml under the directory : values
color.xml
[code] <?xml version="1.0" encoding="utf-8"?> <resources> <color name="ColorPrimary">#5677fc</color> <color name="ColorPrimaryDark">#4e6cef</color> <color name="tabsScrollColor">#455ede</color> </resources>[/code]
- create a directory "color" under the"res" folder.
- create "selector.xml" under "color" directory.
selector.xml
Create new layout xml file :
tool_bar.xml
[code] <?xml version="1.0" encoding="utf-8"?> <android.support.v7.widget.Toolbar xmlns:android="http://schemas.android.com/apk/res/android" android:layout_width="match_parent" android:layout_height="wrap_content" android:background="@color/ColorPrimary" android:elevation="2dp" android:theme="@style/Base.ThemeOverlay.AppCompat.Dark" />[/code] Step 4:
Activity_main.xml
[code] <LinearLayout xmlns:android="http://schemas.android.com/apk/res/android" android:layout_width="match_parent" android:layout_height="match_parent" android:orientation="vertical"> <include android:id="@+id/tool_bar" layout="@layout/tool_bar" android:layout_width="match_parent" android:layout_height="wrap_content" /> <com.pratik.tabbarexample.slidingTab.SlidingTabLayout android:id="@+id/tabs" android:layout_width="match_parent" android:layout_height="wrap_content" android:background="@color/ColorPrimary" android:elevation="2dp" /> <android.support.v4.view.ViewPager android:id="@+id/pager" android:layout_width="match_parent" android:layout_height="0dp" android:layout_weight="1" /> </LinearLayout>[/code]
Step 5:
Declare this classes and variables above onCreate method:
[code] Toolbar toolbar; ViewPager pager; ViewPagerAdapter adapter; SlidingTabLayout tabs; CharSequence Titles[] = {"Android", "Ios", "Windows"}; int Numboftabs = 3;[/code]
Step 6:
Add below code into onCreate method:
[code] // Creating The Toolbar and setting it as the Toolbar for the activity toolbar = (Toolbar) findViewById(R.id.tool_bar); setSupportActionBar(toolbar); // Creating The ViewPagerAdapter and Passing Fragment Manager, Titles fot the Tabs and Number Of Tabs. adapter = new ViewPagerAdapter(getSupportFragmentManager(), Titles, Numboftabs); // Assigning ViewPager View and setting the adapter pager = (ViewPager) findViewById(R.id.pager); pager.setAdapter(adapter); // Assiging the Sliding Tab Layout View tabs = (SlidingTabLayout) findViewById(R.id.tabs); tabs.setDistributeEvenly(true); // To make the Tabs Fixed set this true, This makes the tabs Space Evenly in Available width // Setting Custom Color for the Scroll bar indicator of the Tab View tabs.setCustomTabColorizer(new SlidingTabLayout.TabColorizer() { @Override public int getIndicatorColor(int position) { return getResources().getColor(R.color.tabsScrollColor); } }); // Setting the ViewPager For the SlidingTabsLayout tabs.setViewPager(pager);[/code]
Step 7:
Create package called “slidingTab” and copy and paste below two classes :
1.1 SlidingTabLayout.java
1.2 SlidingTabStrip.java
from IOsched Google App.
Step 8:
Create package called “adapter” and under this package create a class “ViewPagerAdapter”
ViewPagerAdapter.java
Step 9:
Create package called “tabs”, under this package create 3 classes:
1)Tab1
2)Tab2
3)Tab3
And create 3 layout xml file related to this classes:
1)tab_1.xml
2)tab_2.xml
3)tab_3.xml
tab_1.xml
Note : Do same for tab_2.xml and tab_3.xml
Tab1.java
[code] package com.pratik.tabbarexample.tabs; import android.os.Bundle; import android.support.annotation.Nullable; import android.support.v4.app.Fragment; import android.view.LayoutInflater; import android.view.View; import android.view.ViewGroup; import com.pratik.tabbarexample.R; /** * Created by prats on 6/2/2015. */ public class Tab1 extends Fragment { @Override public View onCreateViewundefinedLayoutInflater inflater, @Nullable ViewGroup container, @Nullable Bundle savedInstanceState) { View v =inflater.inflateundefinedR.layout.tab_1,container,false); return v; } }[/code]
Note : Do Same for Tab2.java and Tab3.java
Step 10:
Run the App and Enjoy it.....